Installation details
Homerit PVC-U windows and doors can be installed by experienced builders or window installers.
Normally frames and double glazing units are packaged and delivered to the building site separately. After the frames are installed, windows and doors are glazed onsite.
For some projects we provide onsite glazing service if the builders cannot do site glazing.
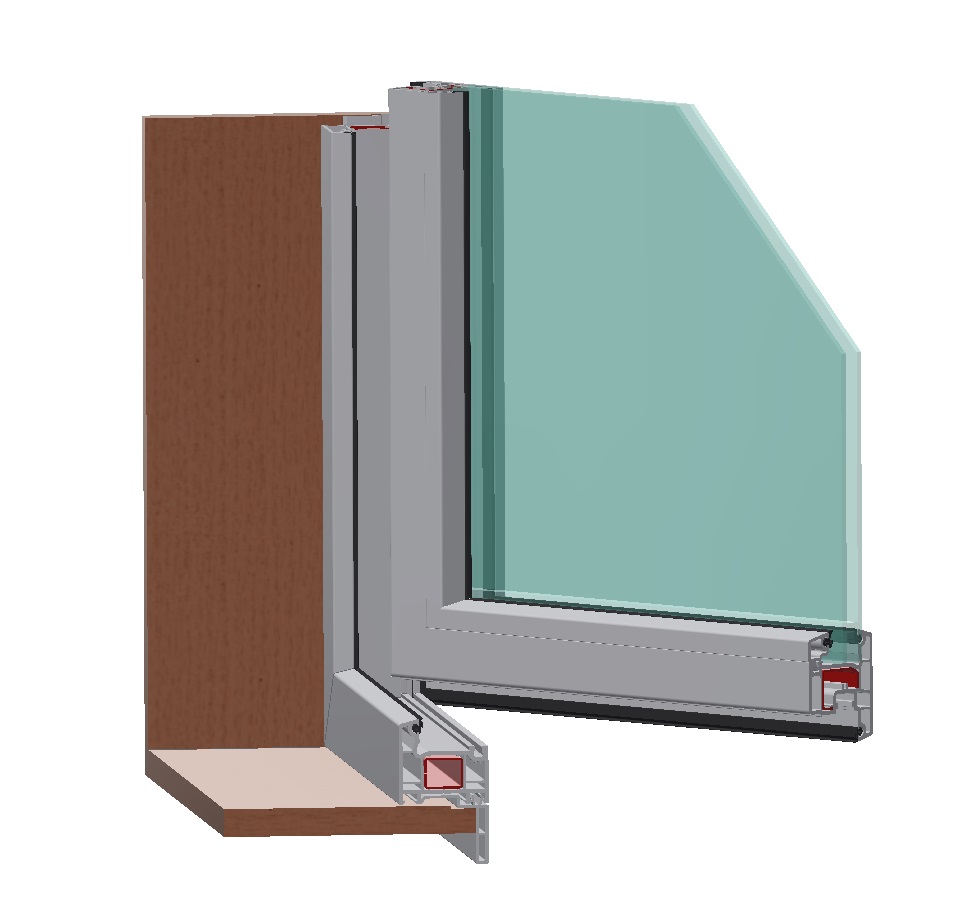
Homerit PVC-U window bottom frames are fully supported by timber jambliners underneath the PVC-U frames thus sill support bars are not needed. This can save both labour and material costs of window installation.

Installation drawings:
You can find installation drawings for standard Homerit PVC-U windows and doors with flanges and jambliners at Resources
Solid construction:
Precast or light weight block walls are common in Europe and many other countries. Standard European PVC-U windows and doors do not have flanges or jambliners. Long sleeved anchor bolts, passing through the profile and into the structure, are used for fixing PVC-U windows and doors into the building structure.
Homerit provides three installation options. (1) with flanges and jambliners – this option suits GIB board inside. (2) with flanges but no jambliners – this lower cost option is good for water tightness. (3) no flanges and no jambliners. We recommend discussing with your local council for approval before purchase.
- Precast concrete panel – Fig 1.11
- Block wall with flange no liner – Fig 1.12
- Block wall no flange no liner – Fig 1.13
Rebate recommendation:
PVC-U window and door frames are bigger than typical aluminum window and door frames. We recommend not having jambliners under the door frames. We also recommend that doors are rebated into slabs etc.
You can find installation details for door rebates at Resources
Fixing Recommendation:
1. Perimeter fixing shall be sited as follows:
a) No fixing 150mm from a corner, both vertically and horizontally.
b) No fixing 150mm at either side or a transom or mullion where it meets the outer frame.
c) Fixing shall occur no more than 450mm centers between fixings at corners, transoms and mullions.
2. Care should be taken so as not to over-tighten the bolt or screw fixing as this may result in frame distortion and/or reduced performance of the window or door system.
3. Additional fixings may be provided at the discretion of the architects and dependent upon the specified quality of the structure and building materials.
Installation procedure:
1. For timber framed buildings, prepare the window/door opening according to NZBC Acceptable Solution E2/AS1 for wrapping of framed opening.
2. Check sill structure for level and straightness. Make adjustment if necessary.
3. Wedge the window or door into position using packers to achieve perfect squareness. Do not bend the framework by over packing.
4. Secure the window or door into framed opening according to installation details and fixing recommendation.
5. Close and lock all opening sashes, check for squareness within the outer frame.
6. Remove all protective tape from the faces of the window frame, clean where necessary with warm soapy water.
Hardware adjustment:
Thanks to the innovative design of the hardware system, certain parts of the hardware are adjustable. For more details click. Siegenia Maintenance Instructions.
